One thing that everyone wants to have perfect at a workshop is Lightning!
Everyone wants a bright white light to work well, and obviously, proper lighting creates a big difference.
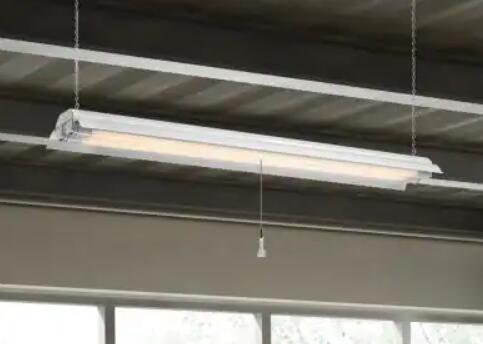
You can install shop lights by yourself, but you also know how to hardwire shop lights before that.
In the workshop, you can wire all the shop lights together to work with one single switch or wire them separately to operate using different switches.
So after hanging the shop lights, the next task is to wire them all correctly.
This post tells about how to hardwire shop lights in minutes.
Why Should You Hardwire a Shop Light?
Proper lighting in the workshop is required to avoid all possible mistakes and risks.
The simplest action, like turning on a light, can change the atmosphere of a place.
Any place that needs good lighting to work or stay is hassle-free, but installing lights is not enough.
Lights require you to do hardwire, and if you don’t know how to do it, it’s not such an easy thing.
If you think that hardwired light means just dealing with two little wires, you are wrong? However, great care should be required when working with electricity.
So if you are not comfortable with such electrical tasks of hardwiring shop lights, kindly contact an expert team.
But if you are sure that you can do it, we will give you all the steps you require to go through to hardwire your shop light successfully.
Tools You Will Need When Hard Wire Shop Lights
- Tape Measure: To measure heights to place switches and outlets, center lighting fixtures, etc.
- Voltage Detector: To check voltage supply
- Wire Strippers: To strip or cut off the insulation on wires
- Screwdriver: To turn screws with slotted heads
- Wire nuts: To secure two or more low or high voltage electrical conductors
- Multimeter: To measure voltages, current, and resistance in an electrical circuit
- Pliers: To trim wires in tight spaces
How Do You Wire up a Shop Light?
You can hardwire LED shop lights in place of fluorescent light easily.
But if you are new here, we will give you some steps to follow one by one.
Steps to hardwire LED shop lights
Step 1: First, prepare yourself for the hard wire by gathering all required tools, LED lights, etc. Also, decide where you want to install lights so your shop light up properly.
Step 2: As we are working with electricity, we will need first to turn off the power to the circuit.
Step 3: Now, take the cable from the switch box to a receptacle and the light fixture. Also, add extra cable between other fixtures that worked with the same switch. Now, put cable straps at every 4 feet and within 12 inches on cable, light fixture, and outlet.
Step 4: Next, we need to open the knockout from each fixture and set a cable clamp in the gap. Here, a knockout is a little disc that you can remove using a screwdriver. Then, with pliers, grasp it and twist it off.
Step 5: Now attach a cable strip 6 inches of sheathing from each cable end. Now add a cable into the box until about 1/4 to 1/2 inch of sheathing is into the box. Next, tighten the cable clamps to keep the cable properly.
Step 6: Now, you are ready to do the wiring, so strip about ¾ inches of insulation from the white and black wires at each place, excluding the receptacle and switch.
Step 7: Now, we need to work on the ground wires. We have to attach the ground wires to the light fixture, switch, and outlet. Then, we have to twist them all and connect them to the green grounding screw. Now white wires need to be joined to the switch and fixtures. Using pliers, we twist the solid wires. Do the same thing with black wire.
Step 6: We will twist the black wires’ ends in a U shape at the switch. Now, put a single wire on each terminal and screw it to secure at each airport. The same way twists black and white wire to form a U shape.
Step 7: Now attach the bare ground wire to the related bare ground wires located in the box. Now tighten the screw to pack the box and outlets. Finally, turn on the power to test the connection.
How to Replace the fluorescent shop light with a LED shop light?
LED lights are the best option if you have fluorescent shop lights and now want to move towards cost-effective energy solutions.
However, once you’ve determined to go for LED lights for your shop lighting, you have to choose to either retrofit your old fixtures or purchase new ones. There are three options you have:
1: Go and find replacement ballast-compatible bulbs, and for the same open the fixture and find the ballast model number. Then find out the compatible LED bulbs.
2: The second option is to do completely new replacement LED fixtures. They’re simple to change if yours are suspended by chains and not as easy if they’re eternally mounted and hardwired.
3: But if you have many fluorescent fixtures or fixtures that are permanently wired, you have to convert them to ballast-free/direct wire LED bulbs.
These bulbs don’t require a ballast as the power wires attach straight to two of the fixture’s sockets. Here you do not have to bother about replacing ballasts.
Rather, you can reuse your existent fixtures, and the conversion is easy.
Precautions when wiring up a shop light
- Keep water away while working with electricity and do not touch wire or circuits with wet hands
- Always turn off your power to work with electricity
- Use properly insulated tools, insulated rubber gloves, and goggles
- Get knowledge of cable wire codes for your country
- If you find anything hard, directly contact an expert electrical team
Can I Convert a Plugin Shop Light to Hardwire?
Yes, you can convert a plugin light to hardware, and it only needs some minutes to convert the fixture!
How to Hardwire a Plug-In Shop Light?
Here’s how to turn a plugin light into a shop light:
- Keep your light fixture up to the ceiling, note down the cord length required, and then add about 6 inches and cut the cord.
- Now cut the outer layer about 5 inches down from the recent cut end. Cut all extra paper and strings till only inner black coated wire, the white wire, and a copper wire remain.
- Remove the insulation from black and white wires. Here, you require about 0.5 inches of the copper wires revealed.
And now your plugin shop light should look exactly like a hardwired one.
Hard Wire Shop Lights in Series
Generally, series wiring is not selected for household wiring, but parallel or series-parallel wiring is preferred.
But sometimes, we require series wiring and connect shop lights in series.
In series wiring for LED Shop lights, each LED will be the same brightness and will not let a single LED have more power than another.
So here, each LED has the same current, so it will not cause the issue of thermal runaway.
1. How many LED shop lights can you connect?
You can connect up to 10 LED shop lights using the formed butt connector or 5.25-foot interconnect cable.
Particular 9.5- and 4.5-inch interconnect cables are also there to use.
When you wire it in series, LED lights work separately.
2. Difference between wiring shop lights in series and wiring one shop light
When you wire each shop light separately, each will operate using a different switch, but they only work with a single switch when you wire them all in series.
Also, in a series wiring, the break in the wire or failure of any single light will break the circuit, and all other lights in the series also stop working.
But when you wire each separately, any issue in one light does not impact any other lights.
But in a series wiring, you need less wire than wiring one shop light separately.
Suggestions of Workshop Wiring Layout
Wiring a workshop depends on the type of workshop, and the particular environmental requirements, like an electronics workshop, need well-shielded wiring to eliminate electromagnetic interference.
But in a woodworking shop, good wiring methods control explosion dangers from piles of sawdust or explosive fumes from varnishes or any other.
Most of the power tools work on 120 Volt/15 AMP circuits, so 14/2 wire with a ground is proper for a workshop.
But 240-volt equipment is required in your workshop, then use 12/2 wire.
If you need wiring up to 6 feet above the floor, shield them from puncture.
Safety Rules for Shop Lights Installation
- If you do not know about electrical wiring or shop light installation or feel uncomfortable like you can’t do the task yourself, always find out a licensed team of electricians.
- Always turn off the main power of the circuit and check with the tester that there is no live wire.
- Do not touch light or wire when they are hot.
- Do not touch electricity wire or cable with bare hands or wet hands. Always wear gloves.
- Do not overextend the highest wattage of the fixture. Extending it may provoke a fire.
- Always do wiring work with a partner who can help you with it.
- Learn your state and local codes of wires before beginning wiring.
- Ground fault circuit interrupter (GFCI) is one of the important methods to elevate any electrical shock accident, so install GFCI.
- Always cover lights over areas exposed to heat.