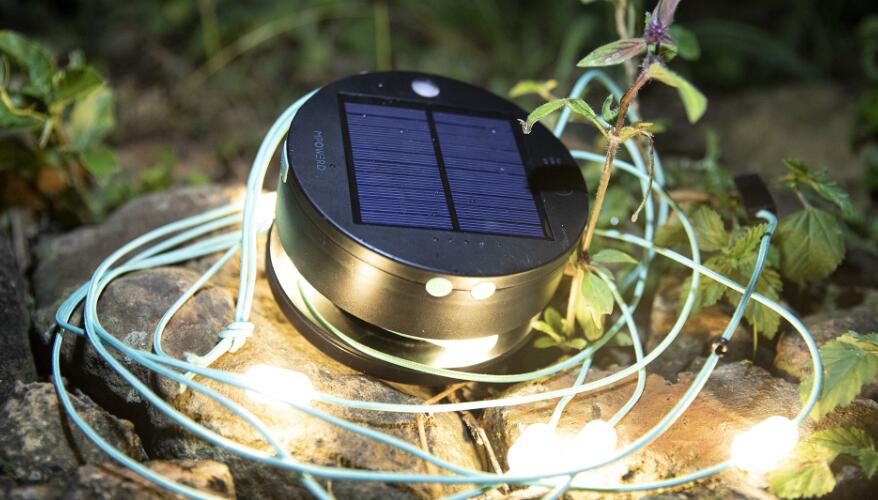
Solar string lights add a touch of magic to any setting. Whether illuminating a pathway or providing ambient light in a garden, they are a popular choice for holiday decorations and special occasions.
Unfortunately, even the best made products can fail eventually.
When your solar string lights stop working, don’t despair – there is likely a simple solution.
Let’s start with how to repair solar string lights!
Why do my solar string lights stop working?
1. Faulty Solar Cells
Solar lights can be tricky, and often, problems with them can be traced back to the panel.
The solar panel contains solar cells, which are responsible for gathering the sun’s energy and transferring it into battery power.
For the panels to function properly, they need to stay clean and be positioned in a way to gather the maximum amount of sun. Extreme weather can also cause issues for the panel – rain and snow often seep into the insides of your light.
If your solar light stops working, you may need to purchase a replacement.
2. Rainwater damage
Solar lights are perfect for outdoor use because they are water and weather-resistant.
However, extreme weather conditions (e.g. rain, snow, high winds) can eventually cause the light to break if it is not water-proof.
If your solar light has filled up with water, take it apart and let the components dry completely before reassembling it.
If it works after you fix it, put a new layer of sealant on the light before using it outdoors again.
3. Fault in the sensor
To fix this problem, start by cleaning the sensor and making sure the lights are not near any other artificial light sources.
If neither of those methods work, contact the manufacturer for replacement sensors.
4. Faulty battery
If by chance your lights are not working at all or keep flickering the cause might be faulty batteries. This might result from long-term use of the same batteries rendering them worn.
If they become faulty, batteries are not able to charge properly and retain their power for only a short period of time.
To fix this, simply replace your old batteries with a new pair.
How to fix the solar panel of the solar string lights?
The solar panel of the Solar String Lights is not working
Possible Solutions:
1. Check the fuse. If it is blown, replace it with a new one.
When the solar panel isn’t working, the first thing to do is check the fuse.
The fuse is a small, cylindrical component that is located in the junction box on the back of the solar panel.
If the fuse is blown, it will need to be replaced.
There are a few things you can do to check your solar panel’s fuse.
The first is to visually inspect the fuse. Fuses will look like small, cylindrical metal tubes.
If the fuse is blown, it will have a blackened or charred appearance.
You can also test the fuse with a multimeter. To do this, set the multimeter to continuity mode and touch the probes to each end of the fuse.
If the multimeter beeps, the fuse is good. If there is no sound, the fuse is bad.
The fuse is rated for the amount of current that it can handle. When the current exceeds the rating of the fuse, it will blow and disable the panel.
If you are not sure what size fuse your panel requires, you can find the information in the owner’s manual or on the manufacturer’s website.
Some fuse might also have the current rating engraved on them.
2. Check Your Breaker Switches
Breaker switches. The switches are usually located in a breaker box, which is usually in a closet or the basement.
You’ll need to know what each switch controls before you can start fixing anything.
Just confirm if the switch links to the strobe lights is on.
3. Check Your Solar Inverter
A solar inverter is a key part of any solar power system. It converts the direct current (DC) power produced by the solar panels into alternating current (AC) power, which is what most household appliances run on.
If your solar inverter isn’t working properly, it can cause problems with your entire solar system. That’s why it’s important to check your inverter regularly and make sure it’s working properly. Inverters usually need to be checked every 6 months
4. Check if the solar panel is getting direct sunlight. If not, move it to a location where it will receive more direct sunlight.
When it comes to solar energy, there are two main things to consider: where to place the solar panels and how to store the energy.
The best place to put solar panels is on a south-facing roof, as this will get the most direct sunlight.
If your home doesn’t have a south-facing roof, you can install the panels on an east- or west-facing roof, or use a ground mount.
Make sure that there are not any physical shades like trees or another large building that might block the sun rays from reaching the panel at any time of the day.
5. Make sure that the solar panel is clean and free of any dirt or dust.
Solar panels are a great way to reduce your carbon footprint and save money on your energy bill, but they need to be cleaned regularly to maintain their efficiency.
Here are a few tips for cleaning your solar panels:
Step 1: Completely disconnect the solar panel from the rest of the components and insulate the wires to prevent chances of a possible electric shock especially when cleaning it outside.
Step 2: Use a soft cloth and a mild detergent to clean the panels.
Step 3: Do not use any harsh chemicals or solvents, as they can damage the panel coating.
Step 4: If there is a lot of dirt or debris on the panels, you can use a garden hose to rinse them off.
Step 5: Make sure the panels are completely dry before reinstalling them.
6. If none of the above solutions work, then the solar panel may be defective and need to be replaced.
Steps on how to replace the solar panel
Replacing a solar panel is not a difficult process, but it is important to take your time and follow the proper steps to avoid any potential damage. Here are the basic steps you will need to follow:
Step 1: Shut down the power to the solar panel. This can be done by flipping the circuit breaker off or by removing the fuse.
Step 2: Remove the screws that hold the solar panel in place.
Step 3: Gently remove the solar panel from its frame.
Step 4: Replace the old solar panel with the new one. Make sure that it is properly aligned with the frame.
How to fix a broken wire on solar lights?
When a wire is broken on a solar light, it can be a real hassle to fix. It’s not as simple as just replacing the wire, you have to take the light apart and solder the new wire in place. Here’s how to do it:
1. Disconnect the solar light from the power source.
How to disconnect the solar light from the power source
There are a few ways to disconnect the solar light from the power source.
One way is to locate the small black box that is connected to the light. This box is usually located on the back or bottom of the solar light.
Remove the screws that hold the box in place and take it out. There should be two wires coming out of the box.
The red wire is the positive wire and the black wire is the negative wire. Unplug the wires by pulling on them gently.
2. Remove the screws that hold the light together.
To do this, find the right-sized screwdriver. this is to ensure you don’t damage the screws especially after using larger-sized screwdrivers.
The screwdriver should also be of the correct type, the light will most likely be held together by small Philips head screws.
3. Take out the old wire and replace it with a new one.
Identify the damaged or frayed wire and detach it from the light. Simply pull on the wire carefully until it detaches from the light. you should then take your replacement wire and size it up with the old wire to cut the correct size.
4. Solder the new wire in place and reattach the light.
Soldering is the process of joining two metals by melting a filler metal (solder) between them. It is a common method of making electrical connections and can be used to join wires to LEDs.
To solder a wire onto a light, you will need:
- Solder
- A soldering iron
- A wire stripper
- A pair of pliers
- A light bulb
The process:
Step 1: Strip about 1/2 inch of insulation from the end of the wire you want to solder. Twist the strands of wire together so that they are all in one place.
Step 2: Cut a small piece of solder and place it on the wire.
Step 3: Hold the soldering iron against the wire and the solder until the solder melts and forms a bond between the wire and the soldering iron.
Step 4: Let go of the soldering iron and hold it against the wire and the solder for a few seconds to make sure the bond is strong.
Step 5: Use pliers to twist the wire around the light bulb base.
The most important factor in soldering is the quality of the solder joint. If the solder is not applied properly, or if the joint is not clean and free of oxidation, the solder will not stick.
5. Reconnect the light to the power
Just follow the reverse of the steps used to remove the light. Finally connect the lights back to the solar and test to see if the new wire works.
Why are only half my solar lights working?
String lights are set up in such a way that one panel powers a certain string of lights. With this in mind, you can simply guess that if there is a fault in anything along the line, the lights on that specific line will stop working. The problem can be a simple bulb failure, which can be remedied by replacing the blown bulb and power will continue to flow correctly.
The problem could also be a damaged wire. If this is the case, trace the faulty wire and replace it with a new one using the above-stated method.
Conclusion
If you’re like most people, you probably don’t want to replace your solar string lights every time they stop working. In this article, we show you how to repair them using a few simple tools. We hope you found this information helpful! Be sure to come back and visit us again soon.