After some time, the electrical cords and cables around your lamp plug may stop working or get damaged.
If you happen to own such floor lamps or any lamp with a damaged plug, the first thing that comes to you is to replace it or repair the damaged parts so that you can reduce electric shock risk or even an electrical fire.
Luckily, improving your floor lamp by replacing the broken plug is very easy.
It only takes a few hours of supplies and works to give your lamp a new look and to aid that phrase.
We tested on how to repair a lamp plug and compiled the easiest method.
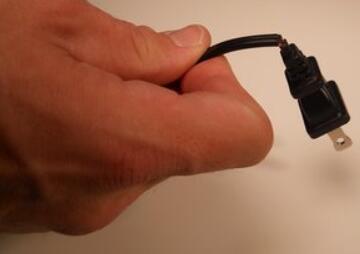
Step 1: Stripping the damaged lamp cord and plug
When dealing with any electrical lamps or items, the first step is to unplug from the main electrical outlet.
Turn off your lamp at the mains for protection against touch potential.
Grab the bottom of your lamp and pull the plug out of the sockets.
Also, avoid touching the lamp’s prongs since they always store currently:
Here are some precautionary tips when unplugging your lamp:
1. Never cut or use a knife to cut the cord while the lamp is still connected with power.
2. If the plug is damaged, switch off the mains and then use insulated gloves to pull out your lamp.
Step 2: Cut the damaged and old plug
To start this process of replacing your damaged plug, measure one to two inches down from your old plug and slice the cord with a kitchen or utility knife.
When cutting, always ensure that the cuts you make are as straight and deep as possible without cutting the connecting wires.
Throw away the damaged part and give space for a new chord; you can also conduct some cleaning by wiping out dust and other particles such as cobwebs.
Step 3: Wire in the new plug
Get your new polarized replacement if the old plug for your floor lamp when buying; consider buying plugs with one prong because they are wider than other options making it simple when wiring it back to your floor lamp.
Avoid using non-polarized options or plugs where the connecting prongs have the same size as the lamp’s electrical code.
Always select a plug that has a similar color to your lamp to avoid clashing.
Step 4: Insulation and Test
Unscrew the back of the lamp’s cover and replace the plug using a tester to remove the screws holding the plug together.
Pull the covers off the plug and then connect red wires to the red extensions you left when cutting the old plug out; in step two, do the same on black and yellow cables.
Use an electrical insulator tape to insulate the necked parts to reduce any scenario where the current can cross the faulted zone and lead to a shock or short-circuiting in your home.
Always be sure to test if all the connections are up to the standards; this can be done using an electrical tester or a voltmeter.
In conclusion, assembling and repairing your floor lamp should not worry you a lot it as simple saw eve discussed above.